
Table of Contents
- What is Claude Code? The Agentic Shift
- Prerequisites: Getting Your System Ready
- Step-by-Step Installation and Authentication
- The Explore-Plan-Code-Commit Workflow
- Advanced Features: Plan Mode and Subagents
- Best Practices for Securing Your Codebase
- Conclusion
What is Claude Code? The Agentic Shift in Software Development
Until recently, AI coding assistants were primarily restricted to line-by-line autocomplete features inside an IDE. However, this Claude Code tutorial explores a completely different paradigm: Agentic Software Engineering.
Released by Anthropic, this tool is a command-line interface (CLI) agent that doesn’t just suggest code—it executes it. It operates directly inside your terminal, reads your entire project structure, plans fixes across multiple files, executes terminal commands, runs test suites, and autonomously handles debugging loops until your criteria are met.

Prerequisites: Getting Your System Ready
Before we initialize the tool, we must ensure your development machine meets the necessary runtime specifications required for AI-agent orchestration.
- Node.js Runtime: The CLI engine runs on modern Javascript runtimes. You must have Node.js 18.0.0 or higher installed. You can verify your setup by typing
node --versioninto your command line. - Git Version Control: Because the agent interacts directly with branches and edits files asynchronously, your project directory must be initialized with Git (
git init). - Anthropic API Balance: The agent charges balance directly per token processed. Ensure your developer account at console.anthropic.com has loaded credits or is bound to an active Max/Enterprise team subscription model.
Step-by-Step Installation and Authentication
Let’s walk through the global deployment steps to set up the engine natively on your operating system.
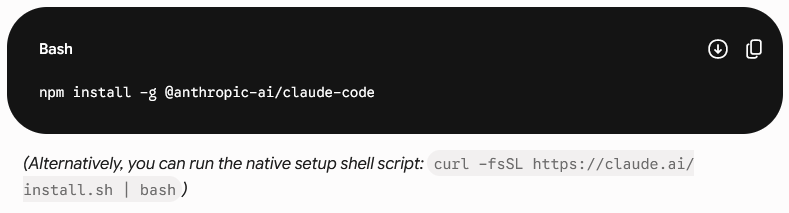
Step 1: Global Package Deployment
Open your preferred terminal emulator (such as Warp, iTerm2, or Windows Terminal) and execute the global node installation command:
Step 2: Initialize and Authenticate
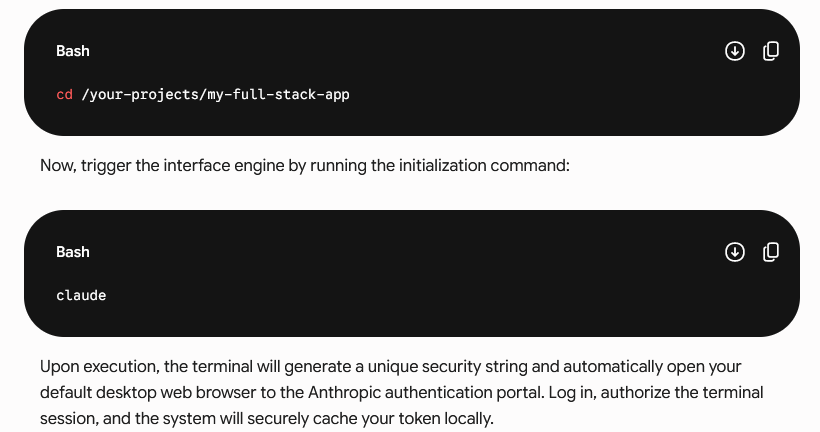
Navigate to the local directory containing your full-stack web application:
The Explore-Plan-Code-Commit Workflow
The core secret to success with this Claude Code tutorial lies in adapting to a structured development loop rather than commanding single prompts. The optimal workflow consists of four clear steps:
1. Explore
When faced with a bug or feature request, delegate the research phase to the agent. Instead of telling it what files to open, prompt it broad outcomes:
“Claude, look through our payment controller pipeline and locate why expired checkout forms aren’t displaying proper frontend errors.”
2. Plan
Before writing any lines of code, force the system into analytical visualization. By entering Plan Mode (hitting Shift+Tab twice in the interactive CLI), you tell the agent to analyze dependencies without modifying files. It will write out a multi-step markdown blueprint of what changes it intends to make.
3. Implement
Review the proposed plan. If you agree, toggle the permission mode to let the agent execute changes. It will modify backend routes, adjust state managers on the frontend, and run linting routines completely in the background.
4. Commit
Once the verification checks pass, do not manually commit the changes. Prompt the agent directly:
“Claude, compile these modifications, structure a semantic git commit message, and stage it onto a new feature branch named dev-checkout-fix.”
Advanced Features: Plan Mode and Subagents
To scale full-stack application builds, a great Claude Code tutorial must highlight two monumental advanced mechanics: Auto-Accept Hooks and Context Retention via CLAUDE.md.
The Power of CLAUDE.md
At the root of your project folder, create a static file named CLAUDE.md. This functions as the permanent memory bank for the agent across separate interactive loops. Use it to specify your build commands, deployment scripts, linting parameters, and coding styles. Whenever the tool launches, it reads this file first, drastically lowering token consumption by eliminating repetitive instructions.
Automating Verification Loops
The agent operates best when given a definitive metric to test its success against. Always provide an executable validation task:

Best Practices for Securing Your Codebase

Allowing an otonom AI agent access to your system terminal requires responsible guardrails. Always enforce these security policies:
- Explicit Approval Mode: Ensure your settings folder (
~/.claude/settings.json) requires keyboard confirmation before executing potentially destructive commands likerm -rforgit push --force. - Isolated Environments: When building complex apps or using experimental npm packages, execute your CLI loops inside a Docker container or an isolated WSL2 directory to guarantee host safety.
Conclusion: Redefining Software Engineering
As demonstrated in this Claude Code tutorial, the transition from conversational chatbots to autonomous CLI workflows is completely changing the timeline of full-stack product building. By mastering the agentic loop, developers can step away from manual syntax debugging and focus purely on system architecture and product vision.
To discover more cutting-edge software suites, make sure to read our extensive review on Genspark vs Perplexity AI or dive into our curated AI Tools hub to optimize your daily technical setup!